Designing Machines with a Competitive Edge
Original Equipment Manufacturers (OEMs) strive to develop unique products with special features and offer extra value that is beneficial to the customer.
This article outlines how to incorporate interface pressure measurement technology, also known as pressure mapping technology, to realize optimal machine design.
Successful integration produces a trustworthy machine that:
- Offers a competitive edge in the market
- Simplifies machine alignment operations
- Saves time, money and resources
Investing in a Streamlined Process
Nowadays, companies prefer to invest in “smart” machines that yield quality products with the lowest possible variation. This typically necessitates purchasing a machine that they trust, one developed to perform to specification with utmost reliability.
When a company is integrating a new machine into their operation, they expect increased productivity in their throughput with improved quality. A machine that supports a quality plan by providing actionable data provides value to the organization even before its first run.
Manufacturing engineers are more confident in a machine that possesses a repeatable setup procedure that can generate verifiable data for quality control records. As manufacturing facilities strive for six sigma quality, 10-50 defects per million opportunities (DPMO), the setup procedure is absolutely vital to proceedings.
Even when all parameters are identical to a previous run, the complexities of a machine can produce different behaviors. Analyzing interface pressure offers critical information in relation to the product being produced.
Ensuring that the alignment of the machine is correct proves to be critical to creating a successful finished product, whether that is in printing, packaging, electrical components or any high volume production.
Knowing exactly what is happening between two surfaces in the machine can offer key insight for optimum machine setup and design.
Mandating this insight during the R&D process can lead to key design improvements and can be used to further develop an optimal setup specification, ensuring quality performance for the machine’s lifetime.
A machine that can perform pressure mapping on its setup configuration gives the operator more confidence and less of a warranty burden to its manufacturer.
Four Characteristics of a Smart Machine:

Image Credit: Tekscan, Inc.
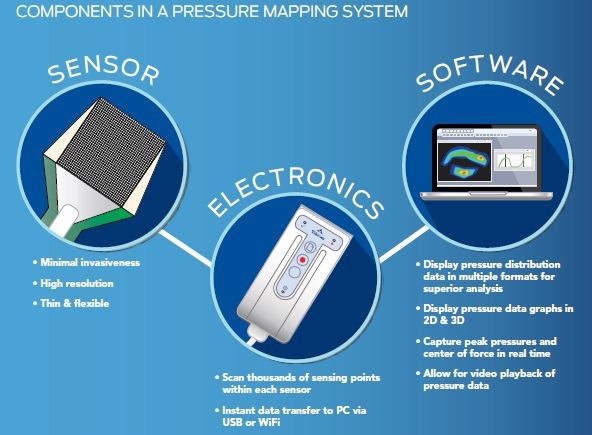
Image Credit: Tekscan, Inc.
What is Pressure Mapping?
Even between comparatively flat surfaces, it is often the case that interface pressure distribution is not equal with localized areas of peak pressure.
Pressure mapping technology aids design engineers by helping them acquire key insight into areas that may influence design and quality. Modern pressure mapping systems need three components – sensors, scanning electronics and software – to supply real-time, actionable data in ways alternative methods cannot.
- The sensor converts compressive pressure loads to a change in resistance.
- The scanning electronics acquire analog data from the sensor and transform the data into a digital signal.
- The software displays the real-time activity of the sensor area, enabling the user to see force, pressure, contact area and timing data.
Benefits of Pressure Mapping Technology
Valuable Insight
Quantifiable Data: A pressure mapping system delivers actionable pressure data. Real-time data analysis means that engineers have the ability to analyze information promptly and make decisions that are supported by the data. This data includes:
- Center of Force
- Forces in Different Areas
- Pressure Distribution
- Peak Pressure
- Timing
- Total Force
Corrective Action Feedback
Real-Time Feedback & Analysis: A pressure mapping system offers real-time feedback, enabling the engineer to evaluate any issue that occurs in their process and promptly fix it. This saves company downtime that can usually be rather costly, depending on the product and run schedule.
Quick & Accurate Setup
Set it & Go: A pressure mapping system has a user interface that has been customized based on the user’s preference. Once specifications of proper setup are in position during initial testing, a streamlined process is established. This process facilitates a rapid and accurate setup prior to conducting any kind of run.
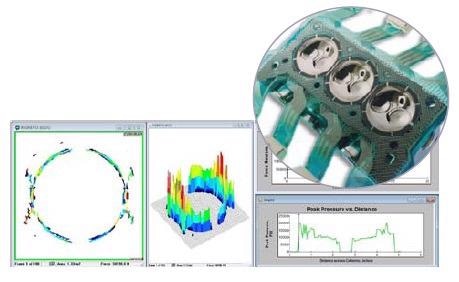
Image Credit: Tekscan, Inc.
Validating the Technology: R&D to Full Integration
Pressure mapping systems are typically used for Research & Design and Test & Measurement purposes. There is usually a journey a company takes before investing in embedding a particular system into their machines. This journey is detailed in the steps below:
Phase 1: The R&D Process
Initial investment in Tekscan’s I-Scan™ system to authenticate and enhance the repeatability of a machine process. Acquire key insights into how the machine could be set up for the best possible performance.
Phase 2: In-Field Machine Setup
Provide the field service team with I-Scan systems so that they have the capacity to service customers by supplying them with a guaranteed setup that is supported by quality data.
Phase 3: Integration Into Machine U.I
Invest in the integration of the machine with the system. This guarantees an appropriate setup and leads to increased customer confidence. These customers invest in a quality product, and your credibility as an innovator and manufacturer rises.

Image Credit: Tekscan, Inc.
Designing a Machine with Interface Pressure Measurement Technology
Integrating pressure measurement technology offers insight into what could have otherwise been missed. The primary objective of a machine designer is to deliver the optimal design to the customer. This means ensuring that each component of the machine is in proper and efficient working order for the given application.
Pressure mapping technology makes sure that setup is conducted properly and offers the designer and user actionable insight in real-time. This technology is an added-value feature that converts a modern machine into an innovative one that customers can depend on.
This state-of-the-art add-on helps strengthen the OEM’s credibility amongst their customers by supplying a machine with a competitive edge.
Ideal Industries & Applications for Integration
Pressure mapping technology is the perfect solution for measuring pressure distribution in a machine where two surfaces come into direct contact. This is frequently seen in, but not limited to, the below industries and applications:
- Printing
- Packaging
- Microelectronic Components
- Electronic Assembly
The integration of sensor technology and software into these machines facilitates a well-controlled, quality process. More data and insight means an improved and streamlined process.
Ideal Applications for Pressure Mapping Integration:
- Bar Sealing
- Molding
- Nip Rolls & Laminating
- Thermoforming
- Tool & Die
- Ultrasonic Welding
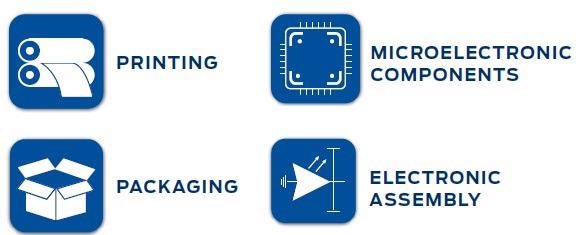
Image Credit: Tekscan, Inc.
Ultrasonic Welding: Contact Lens Packaging Solution
Packaging contact lenses necessitates a machine that produces a uniform seal. This sealing process includes ultrasonic welding, which uses heat and applied force to bond thermoplastics.
If a seal is damaged, then a saline solution leak occurs, which ultimately leads to dried-up contact lenses. An uneven seal is typically the result of non-planar machine parts causing an uneven pressure distribution and thus a misalignment.
A machine designed with interface pressure measurement technology can guarantee the correct alignment that produces an even seal. A designer with key insights into the seal’s pressure distribution can develop a machine with a consistent setup resulting in a proper seal.
Ultimately, this technology offers the user insight into whether the appropriate amount of pressure is being applied to produce a quality product. Such key insight helps enhance productivity and reduce waste. This technology offers the machine builder a design for guaranteed alignment and quality assurance.
Similar Applications:
- Any Form, fill and seal application
- Single serve packaging
- Toy manufacturing
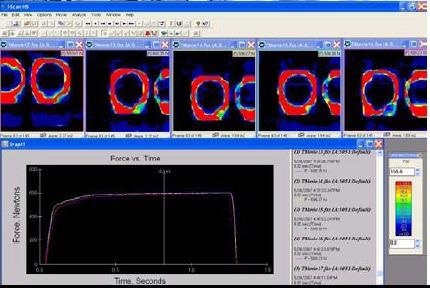
Image Credit: Tekscan, Inc.
Sealing Bar: The Streamlined Packaging Solution
The food packaging industry must ensure high standards for seal inspection. These standards are to protect the consumer from tampering and/or receiving a defective product. As stated in the previous application, a proper seal means that products are both safe and of high quality.
Sealing bars are utilized to seal two parts of a package in a high temperature environment. Machine designers can incorporate pressure mapping technology into their machines to guarantee a proper seal.
Integration of this technology into their software can streamline processes, producing a simplified user experience. High temperature sensors are usually incorporated for this type of application.
This means that the user can take pressure measurements without waiting for the machine to cool down. The incorporation of this measurement technology could mean a reduction in downtime and a more controlled process.
Similar Applications:
- Cereal bags
- Coffee bags
- Medical supplies
- Toothpaste
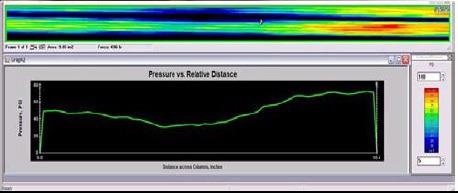
Image Credit: Tekscan, Inc.
Electronic Assembly: The Pick and Place Solution
In modern processes, most electronic assembly is performed by robots. These robotic parts are tasked with picking up delicate components and placing them on a circuit board. This process necessitates the appropriate application of pressure and extremely precise placement.
Embedding pressure measurement technology into an assembly machine controls the robotic elements and ensures that they are interfacing with the board properly and with the right amount of force.
This insight helps prevent extremely costly equipment and product damage. Incorporating high resolution pressure sensors, electronics and customized software generates a streamlined procedure for such a high precision process.
Similar Applications:
- Chemical Machine Polishing (CMP)
- Heat sinks
- Probe card testing
- Robotic chip placement
- Wafer polishing
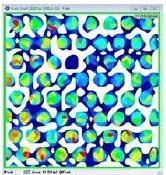
Image Credit: Tekscan, Inc.
Nip Alignment: The Roll Misalignment Solution
When it comes to a printing press, time is money. Roll misalignment can be a costly burden to a production run. Five minutes of run time on rolls that are incorrectly aligned can result in thousands of dollars in product damage.
A production line with integrated pressure mapping technology produces a line with data that is easily actionable. The integrated software informs the user of any nip roll error and how to fix it. This feedback is clear and directional, facilitating rapid and proper machine setup before or after a run.
This actionable data also enables the user to assess crowning, diameter variations and deflections. A system integrated with this technology incurs less machine downtime, which can generate increased yields, reduced waste and lower costs.
Similar Applications:
- Converting
- Laminating
- Paper printing
- Packaging
- Textiles
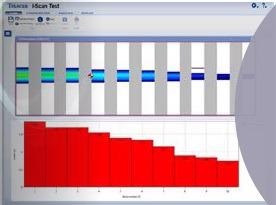
Image Credit: Tekscan, Inc.
Conclusion: Invest in Pressure Mapping
The examples and successes detailed in this article are the product of machine designers partnering with Tekscan to offer an actionable solution to meet their particular goals. While each and every process is different, Tekscan’s team can help companies each step of the way when looking to incorporate pressure mapping into their machines.
Discuss your application with Tekscan, a company that understands the challenges OEMs face and the inherent risks taken when investing in new technology to get that competitive edge.
Whether it’s a standard pressure mapping system or a customized integrated solution, Tekscan has a track record that is proven in helping OEMs achieve an improved understanding of their machines and procedures by supplying trustworthy, actionable data.
Return on investment comes in the form of confidence in machine design, a streamlined process and an enhanced end-user experience.
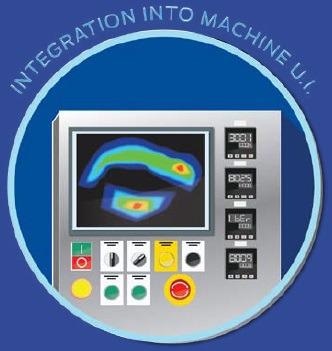
Image Credit: Tekscan, Inc.

This information has been sourced, reviewed and adapted from materials provided by Tekscan, Inc.
For more information on this source, please visit Tekscan, Inc.