As electric vehicles and other battery-powered applications become more popular, there is also an increasing demand worldwide for high-performance batteries, such as lithium-ion batteries.
When producing modern batteries, the main challenge is reducing manufacturing costs, extending useful life and, most importantly, maximizing energy density.
Sensors from Micro-Epsilon are employed throughout the complete manufacturing process to accomplish these goals. They perform a number of measurement tasks for machine monitoring, quality assurance and thickness control.
Modern-day battery cells must be environmentally friendly and sustainable while offering high performance. The long-term objective is to see vans, cars, busses, construction machinery and trucks transition away from dependence on fossil fuels and towards electric drives predicated on fuel cell and battery technology.
The transformation of previous drives has long been on the cards, and production processes are going at full speed.
In order to boost the performance of energy storage devices while preserving valuable resources, manufacturing processes are becoming increasingly sophisticated. This demands high precision, innovative sensors that are able to monitor automated manufacturing processes inline.
There are many phases to the assembly of a lithium-ion cell. Production can be split into three main process stages: electrode fabrication, cell assembly, and formation and aging.
Micro-Epsilon sensors are employed in all key process stages to untangle a variety of measurement duties. Micro-Epsilon carries an extensive product range with the largest collection of physical measurement techniques for accurate distance and displacement measurements.
What makes Micro-Epsilon’s sensor technologies special is that they are established, manufactured, and supplied in-house. Therefore, customer-specific modifications can be applied to the sensors if and when required.
Coating
Wet Film Thickness Measurement of the Cathode Materials and Anode
During the coating procedure, the film is either intermittently or continuously coated and over a width of up to 1000 mm. The significant factors to consider are the film and coating thickness, cleanliness, surface quality and preventing gas inclusions.
In order to track the anode’s and cathode materials’ wet film thickness, it is essential that an accuracy of <±1 μm is maintained at 150 to 500 µm object thickness.
For this measurement task, it is advisable to use the thicknessGAUGE inline measuring system, which consists of a linear unit with electromechanical drive, an automatic calibration unit, two confocal chromatic distance sensors, and a multi-touch panel IPC.
The confocal sensors apply the differential method to measure the material surface from both sides. The distance between the sensors is defined at regular intervals based on automatic calibration with a reference target.
In measuring mode, the two sensors are able to detect the distance to the material surface. The thickness of the material is calculated using the established distance between the two sensors in conjunction with the distance values.
The high resolution of the confocal sensors enables even the slightest deviations to be detected.

With double-sided thickness measurements, two sensors (confocal chromatic sensors in this case) are arranged opposite each other and measure the distance to the film. Image Credit: Micro-Epsilon
The measuring rate of up to 5 kHz and the high precision of ±0.25 µm facilitates thickness measurement that is fully automated. Utilizing the linear axis to adjust the thicknessGAUGE across the strip enables the determination of the complete transverse profile.
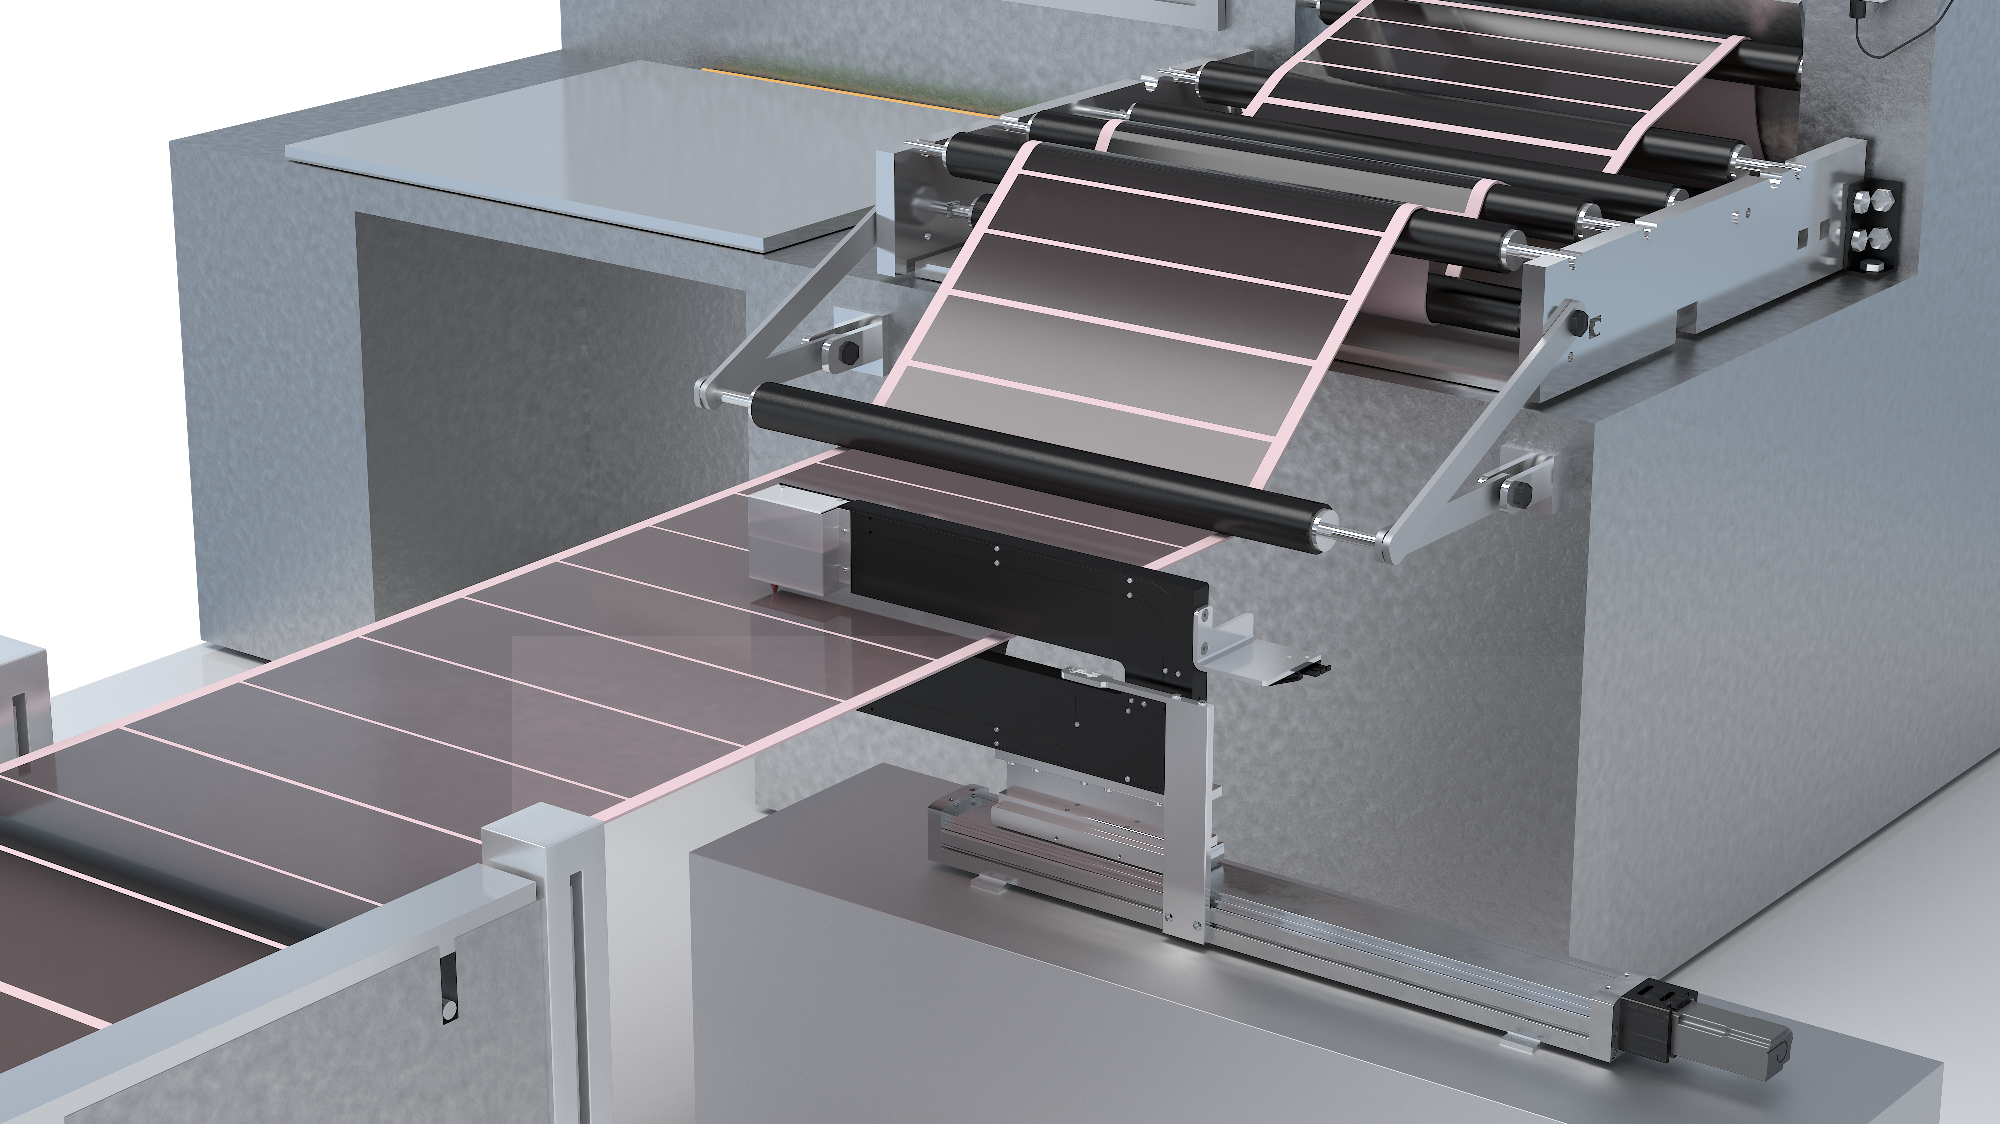
ThicknessGAUGE sensor systems are used for inline thickness measurement of strip materials. Image Credit: Micro-Epsilon
Drying
Drying Process of the Cathode Materials and Anode
Once the coating process has been completed, the coated aluminum or copper film then enters the drying process: drying speeds are around 100 m/minute at 80 to 160 °C. Once the cathode materials and anode have dried, a thickness test is needed for quality assurance.
The accuracy needed is 1 µm for a target thickness of 75 to 400 µm.
Micro-Epsilon’s confocal chromatic and capacitive sensors are particularly well-suited for this measurement task. The sensors are extremely compact, ideal for industrial requirements and produce the greatest accuracy in the submicrometer range irrespective of whether the surface is matt or glossy.
Confocal chromatic sensors offer advanced technology in combination with rapid speeds and the highest precision.
Micro-Epsilon’s unmatched, dynamic product range of confocal chromatic sensors are able to accurately resolve fast distance and displacement measurements without making contact or wear. It is possible to measure the minor details and structures on almost all surfaces with the greatest accuracy, thanks to powerful controllers and precise sensors.
High-precision measurements can be achieved on reflective, glossy surfaces such as highly polished metals or liquids, on matt surfaces, including cathode materials (lithium/manganese/cobalt/nickel mixture) and graphite, and even on transparent materials such as glass or plastic plates.
Due to the rapid exposure time control, the confocalDT system reliably measures even when the material changes from glossy to matt and vice versa.
Calendering
Roller Gap Measurement with Calenders
Calenders enable battery cell materials to be compact, such as electrode films for lithium-ion batteries. Two adaptable rolls facilitate the rolling of the material mixture to the specified thickness.
For consistent quality, continuous monitoring of the roller gap with micrometer precision is necessary. Capacitive sensors from Micro-Epsilon guarantee compliance with extremely low tolerances. The sensor measures at a 90° angle to the roller.
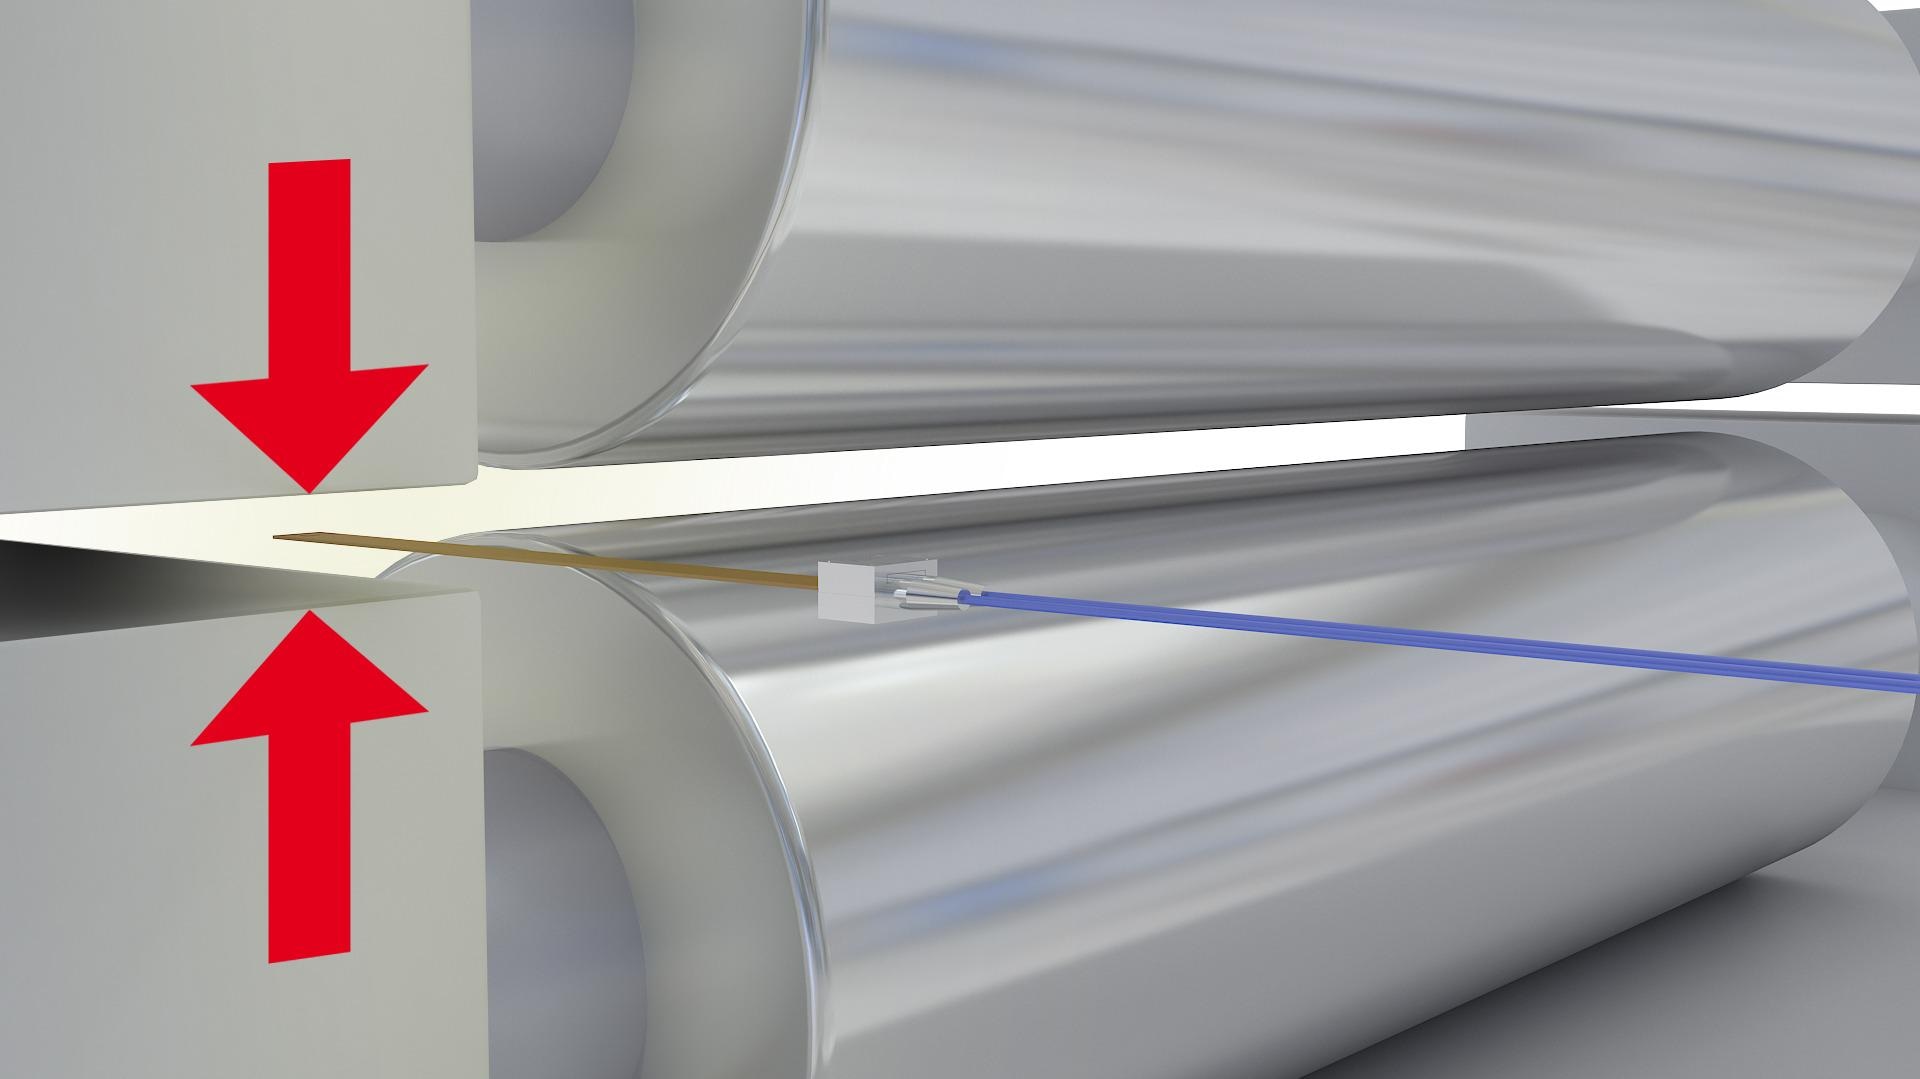
Capacitive sensors from Micro-Epsilon ensure compliance with extremely low tolerances. Image Credit: Micro-Epsilon
Thanks to their sophisticated technology, capacitive sensors from Micro-Epsilon offer measurement values down to the submicrometer range even at extreme temperatures. They are appropriate for a variety of operating conditions, ranging from ultra-low temperatures to clean rooms or ultra-high vacuums and industrial environments.
Capacitive sensors from Micro-Epsilon also offer prolonged stability as no integrated components could limit the service life. Another benefit is the combination variety, as any Micro-Epsilon controller can be used to operate capacitive sensors without any complex calibration.
For gap measurement on all conductive objects, the capaNCDT MD6-22 two-channel handheld measuring device is a mobile solution. This capacitive handheld measuring device is extremely handy as it is lightweight and can be operated using a touch screen.
Moreover, a variety of features are factory preset such as automatic gap detection, which streamlines parallel alignment of the flat sensors for double-sided measurements. The memory function facilitates greater flexibility. It allows the user to establish measurement values on various points and use them for future evaluation by storing them on a micro SD card.
Cutting
Edge Curvature After Cutting
During this stage of manufacturing, a coated parent coil is cut into multiple daughter rolls. This is conducted by applying either laser cutting or a rotating knife. After slitting, curvatures and deformations often appear on the film.
However, clean-cut edges are critical for achieving high quality. Therefore, checking the edge curvature is crucial, which is why the edge profile is measured to micrometer accuracy. For this purpose, scanCONTROL laser profile scanners are employed. These record the profile continuously once placed over the edge of the film.
Due to their exceptionally high resolution and insensitivity to reflecting surfaces, these sensors offer stable measurement results and extremely accurate 2D profiles, from which 3D point clouds can also be created. These compact sensors can also be fitted into limited installation spaces.
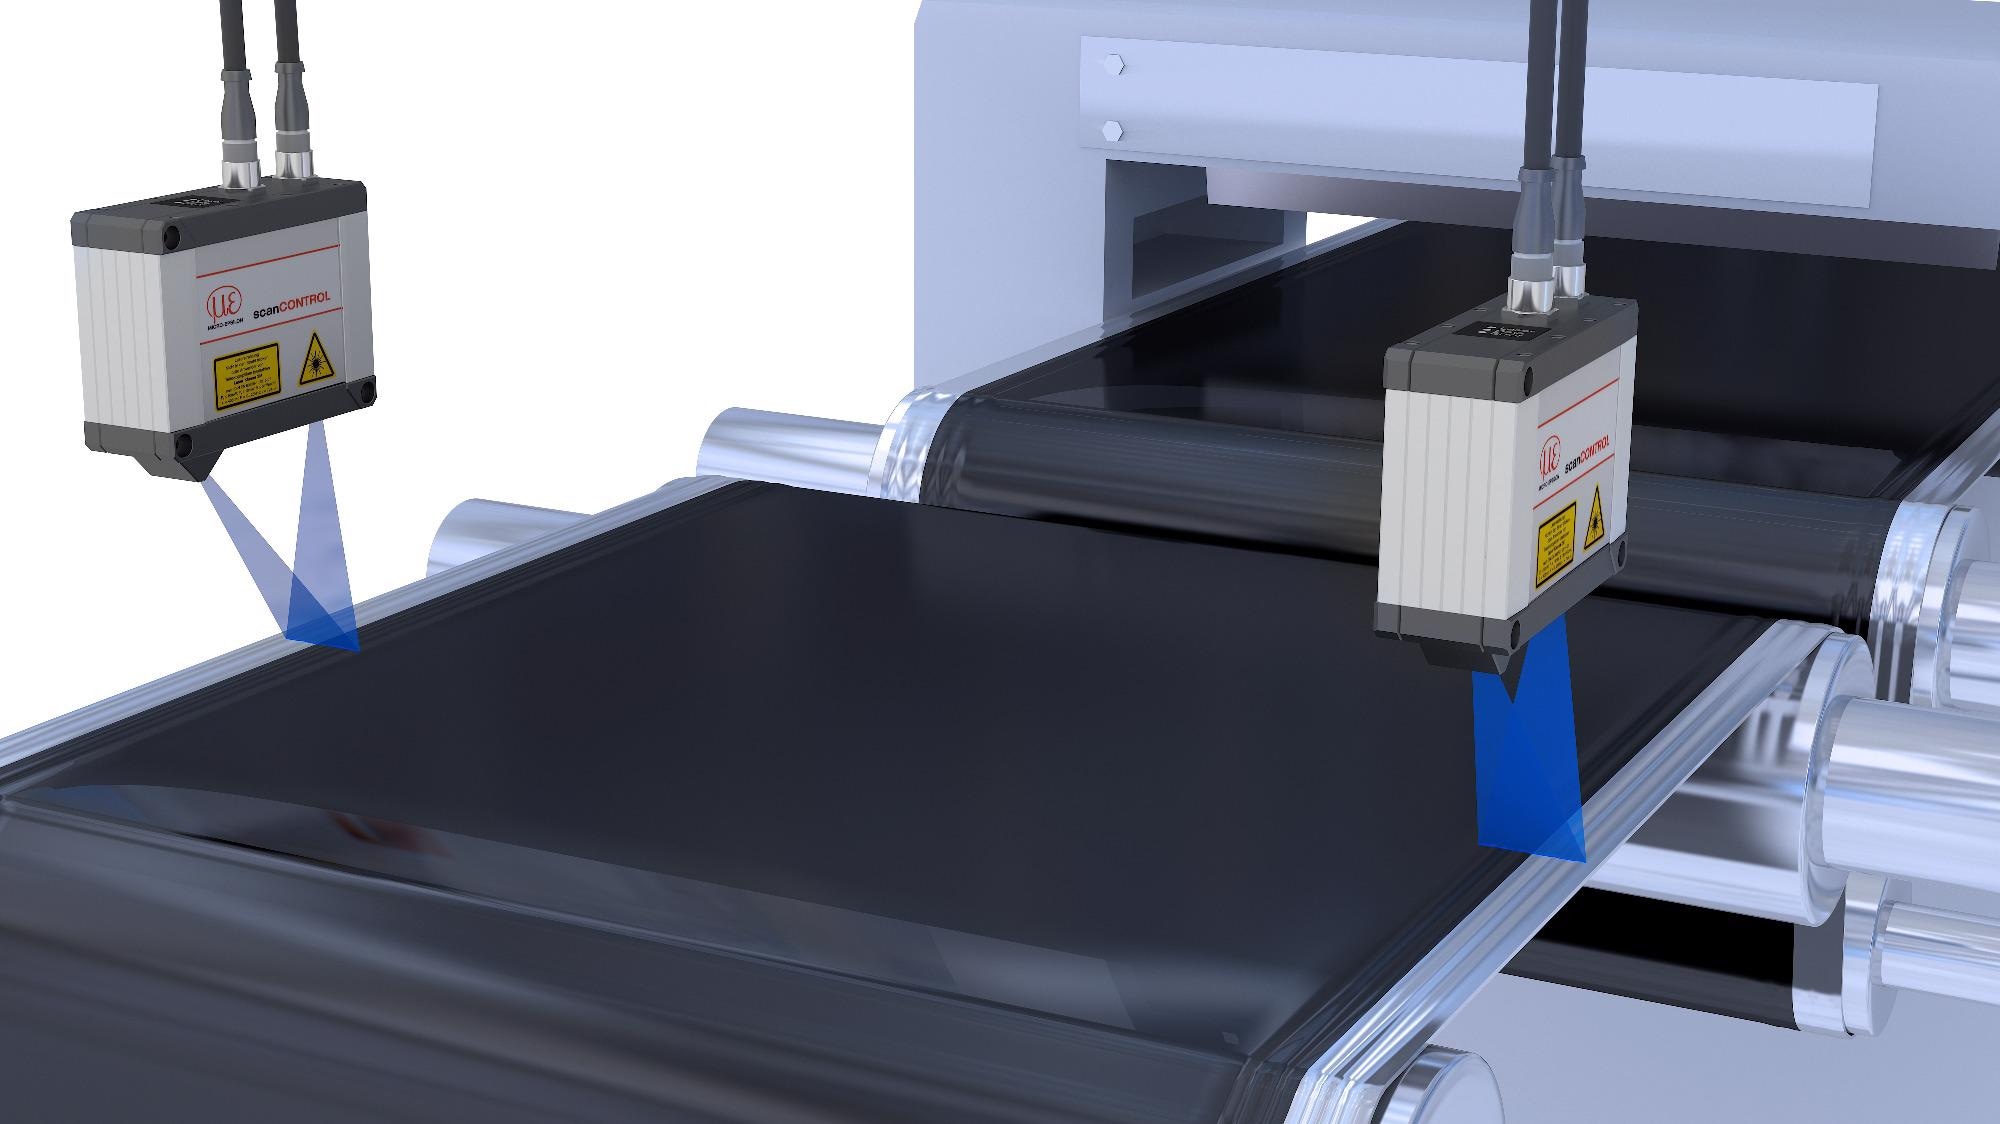
scanCONTROL laser profile scanners are used to check the edge curvature to micrometer accuracy. Image Credit: Micro-Epsilon
Cell Assembly
Volume Measurement When Applying the Heat Conducting Paste
Once the battery packs have been inserted, a heat-conducting paste is automatically applied between the bars to conduct the waste heat to the exterior. Before applying the paste, the volume between the bars up to the surface of the battery packs must be established.
Subsequently, it is necessary to measure the volume of the paste applied relative to the volume in the empty state.
Ideally, the volume of the paste should be slightly higher than the volume in the empty state. Laser scanners from Micro-Epsilon are able to perform this task. The application amount and the dispenser distance are controlled by a scanner attached to the dispenser.
In terms of their accuracy and measuring rate, these sensors are among the most powerful profile sensors in the world. They have the capacity to detect, measure and evaluate profiles across a variety of object surfaces without contact. The scanCONTROL models require no external controller, which streamlines the installation effort considerably.
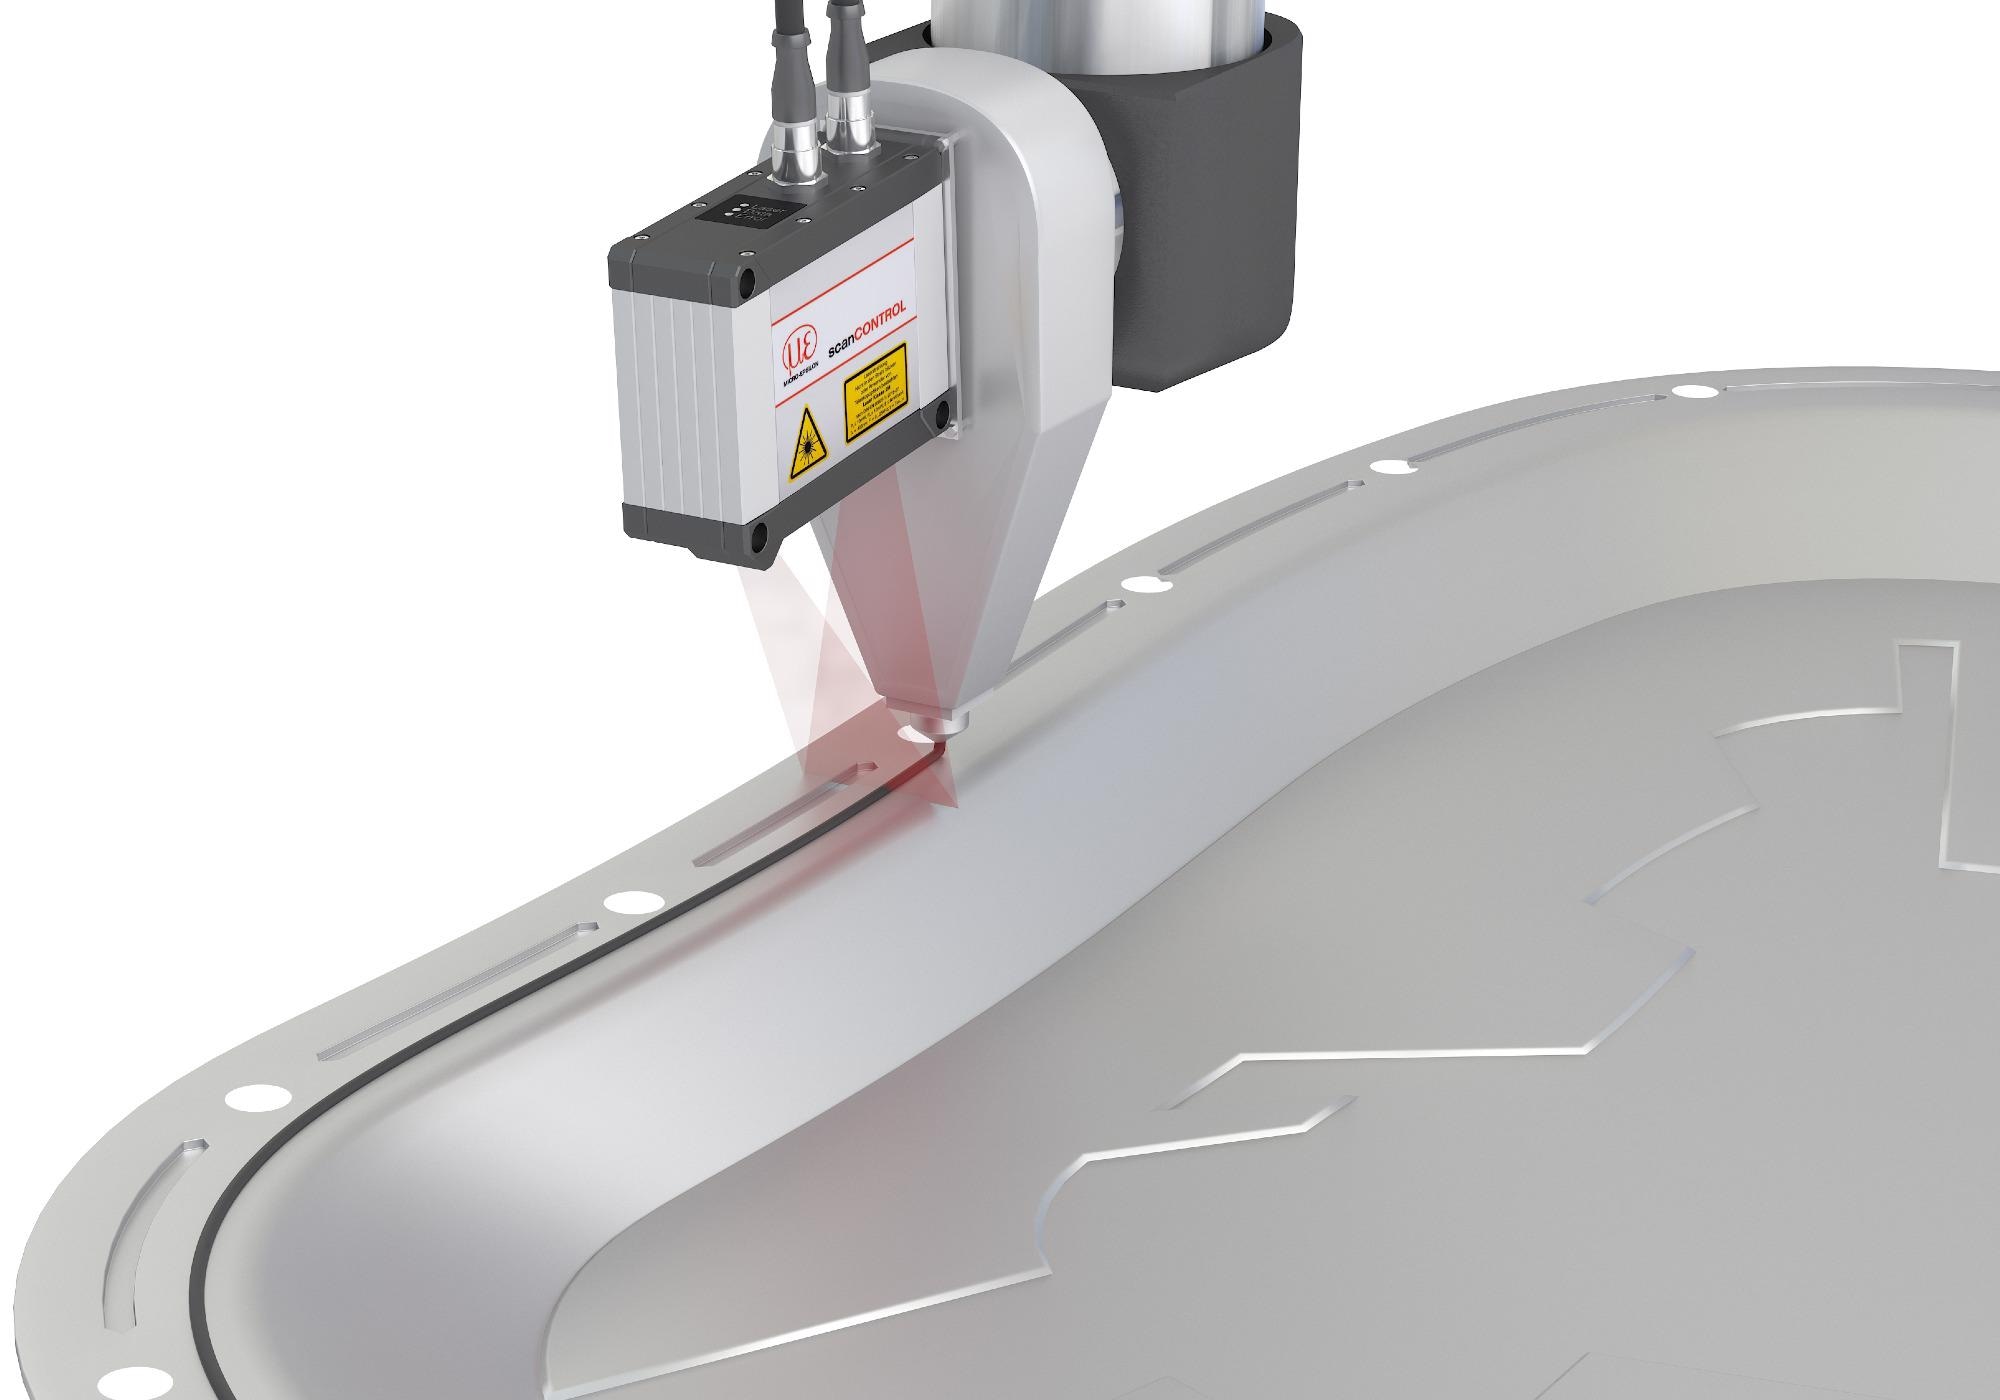
Laser scanners from Micro-Epsilon are used to determine the volume between the bars up to the surface of the battery packs to automatically apply a heat-conducting paste between the bars to conduct the waste heat to the outside. Image Credit: Micro-Epsilon
Formation
The initial charging and discharging of the battery occur in the so-called formation stage. During the first charging stages, temperature development is a crucial parameter and is therefore monitored via thermal imaging cameras. These offer a clear insight into the temperature distribution and possible short circuits.
The thermoIMAGER thermal imaging camera has been developed to withstand demanding industrial serial applications. The lenses are focused by an integrated motorized focus, which allows the resolution of small measuring ranges. Thanks to the powerful software, automatic monitoring of hot and cold spots is possible.
The camera has the capacity to simultaneously focus on and monitor up to three measuring fields on a continuous basis. The convenient integrated motorized focus facilitates remote focusing. Measurement values can be easily sent to a controller, which, if for some reason limit values are exceeded, can activate appropriate actions such as alarms, cooling or switching off.
The sturdy and compact thermoIMAGER TIM thermal imaging camera was developed for industrial use. Commissioning is easily achieved using the TIM Connect software included in the scope of supply.
It is possible to output measured values via Ethernet or a process interface (4-20 mA) – for operation in autonomous mode, no additional PC is required.
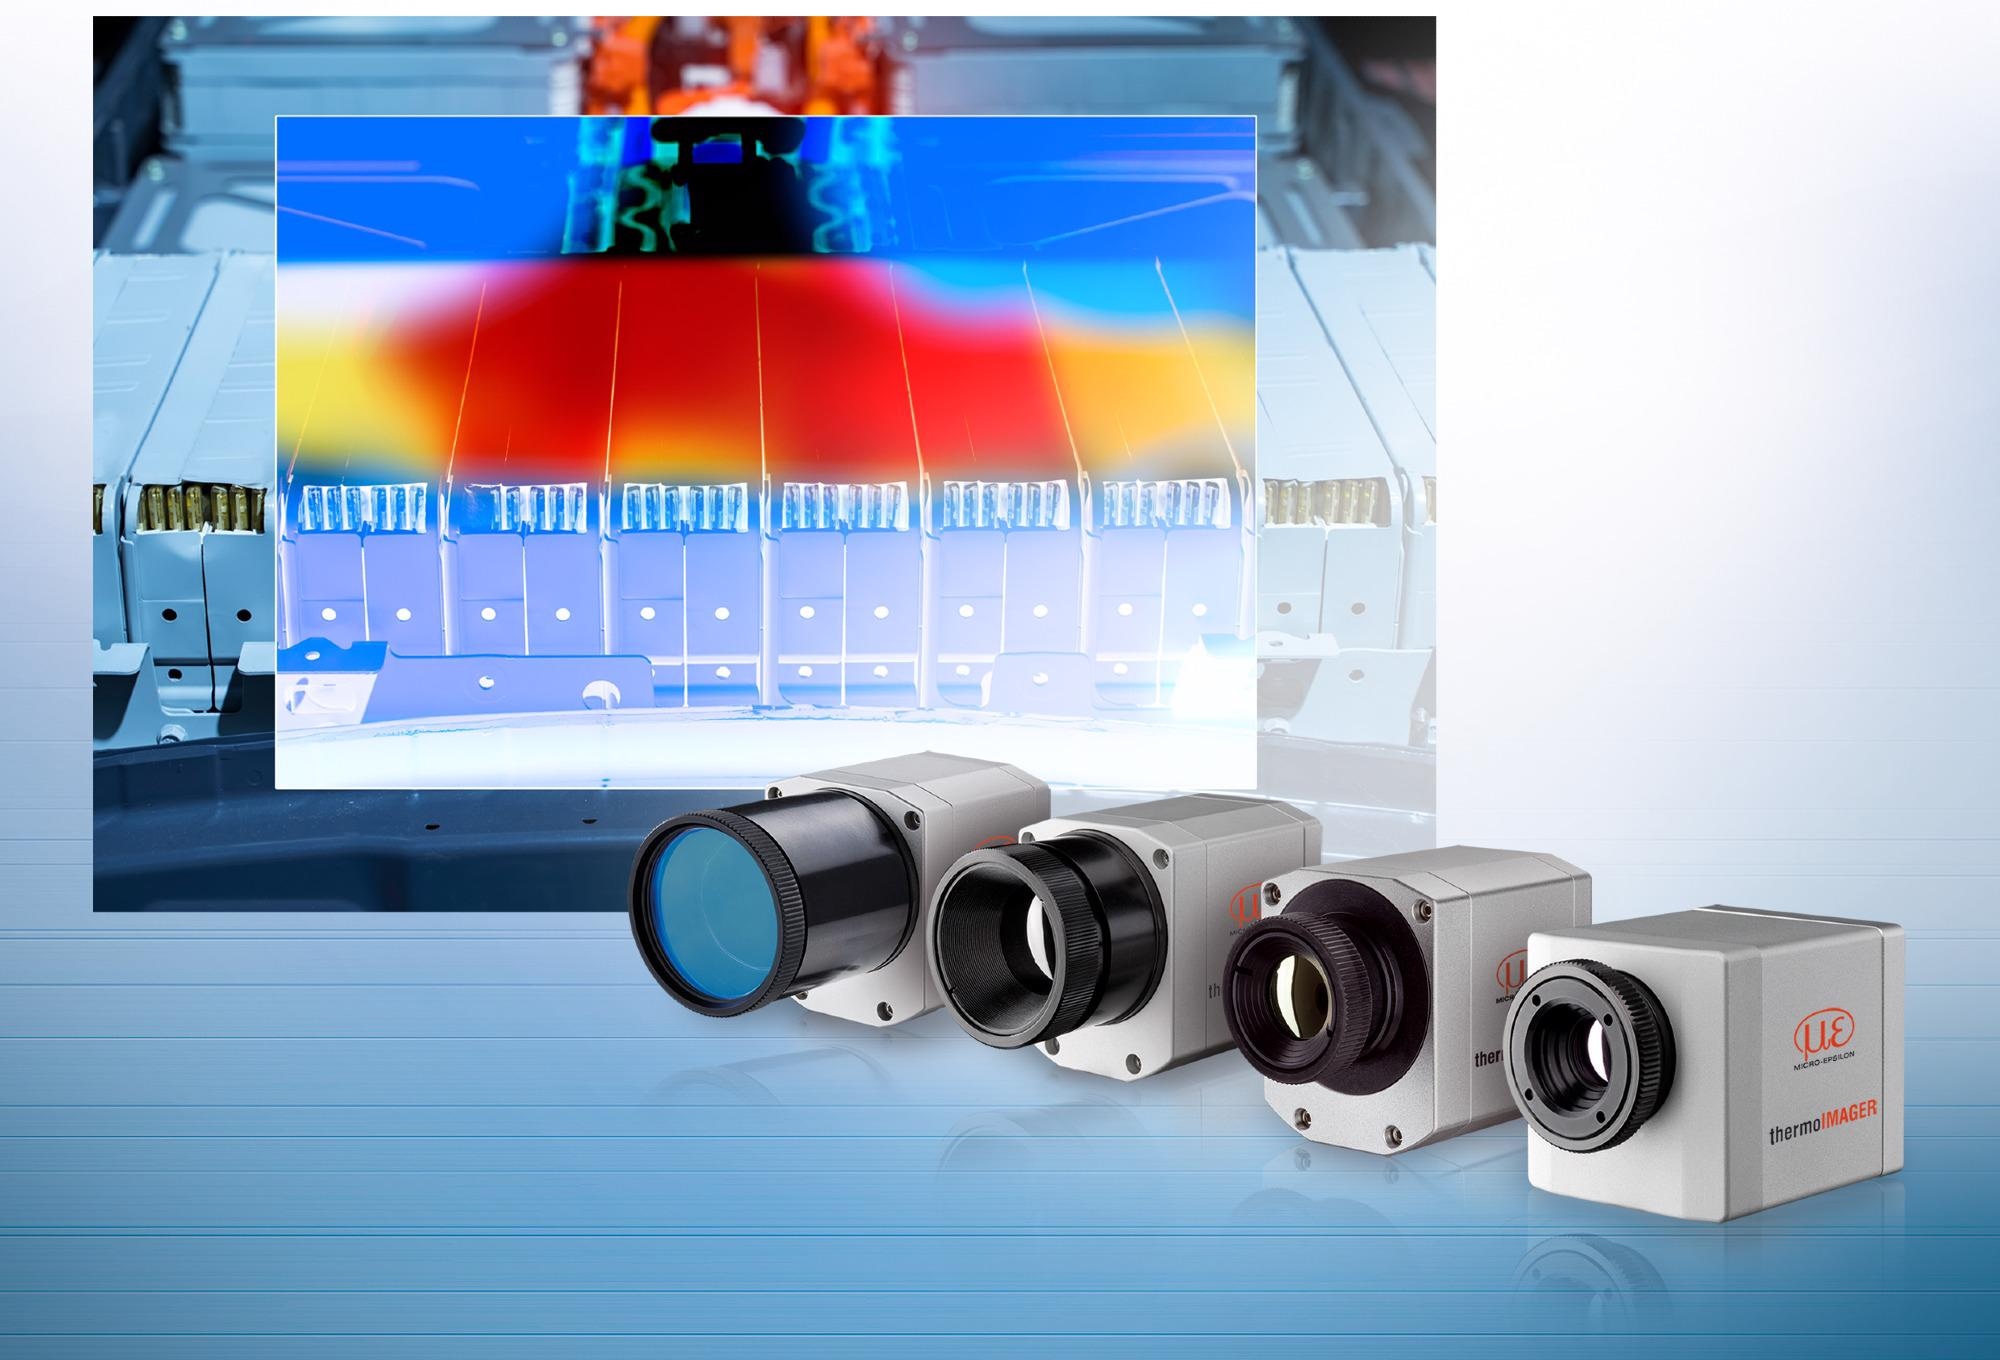
thermoIMAGER TIM thermal imaging cameras are used to monitor the temperature distribution and indications of possible short circuits. Image Credit: Micro-Epsilon
Conclusion
Micro-Epsilon carries an unparalleled range of sensors, measurement systems and customized inspection systems in Europe. The extensive product range, which is based on a variety of measurement principles, is particularly well-suited for the production processes and demands of battery production.
Micro-Epsilon’s high-precision sensors have the capacity to measure acceleration, color, displacement, distance, inclination, position and temperature in order to achieve robot-assisted 3D inspection of both matt and glossy surfaces utilizing reliable, sophisticated inspection systems.

This information has been sourced, reviewed and adapted from materials provided by Micro-Epsilon.
For more information on this source, please visit Micro-Epsilon.