The German Plastics Center (SKZ), a leader in integrating measurement technology for component inspection and process monitoring, is addressing the challenges in the plastics industry, notably in quality assurance for 3D printing.
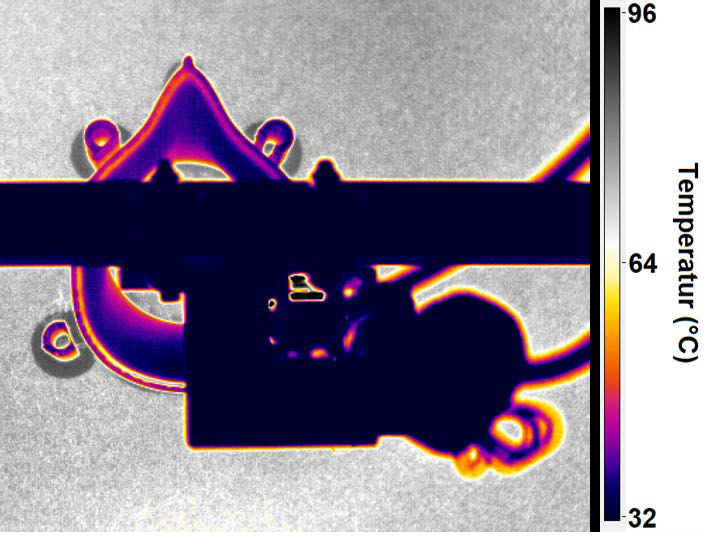
Thermal image during the printing of a mask holder. The cooling behavior of the filament in the uppermost layer behind the print head (black in the image) provides information about the print quality. Printing direction is counterclockwise. Image Credit: The German Plastics Center – SKZ
Collaborating with Optris GmbH, a Berlin-based firm specializing in cutting-edge infrared measurement technology, SKZ has been able to enhance this process. Their joint efforts have led to the optimization of quality assurance through the application of thermal imaging cameras, enabling more precise and contactless temperature measurements.
Thermography is a promising approach to quality assurance in additive manufacturing as it involves no contact and can be utilized for whole surfaces. Inspection can be conducted inline during the printing process or afterward on the manufactured component.
To this end, Optris’s infrared cameras are used for inspection as a part of a finished research project (grant number: IGF 21677 N) funded by the German Federal Ministry for Economic Affairs and Climate Action. These cameras are particularly suitable given their compact design.
Modern Production Increasingly Using 3D-Printing Processes
3D printing, or more generally, additive manufacturing, is considered an essential technology of the 21st century. The functions of additively manufactured components are abundant and diverse, ranging from medical technology to the automotive sector and the aerospace industry.
In addition to small batches, intermittent supply shortages are leading to spare parts and individual components being increasingly manufactured using 3D-printing processes.
Fused filament fabrication (FFF) is a filament deposition method overwhelmingly utilized in plastics processing. In FFF, slicer software is initially used to dissect a 3D model of the print object into a layer-by-layer structure, and the printing paths that define how the printer deposits the filament melted in the nozzle are planned.
Depending on the structure of the print object and the material utilized, an array of parameters must be altered. There are numerous parameters, so it is not always possible to evade defects in the print. Defects must be identified immediately during the manufacture – particularly for spare parts with a rapid turnaround.
Therefore, quality assurance throughout the printing process and on the completed component is essential in industrial applications. The Optris PI 640i thermal imaging camera can be used to enhance quality assurance.
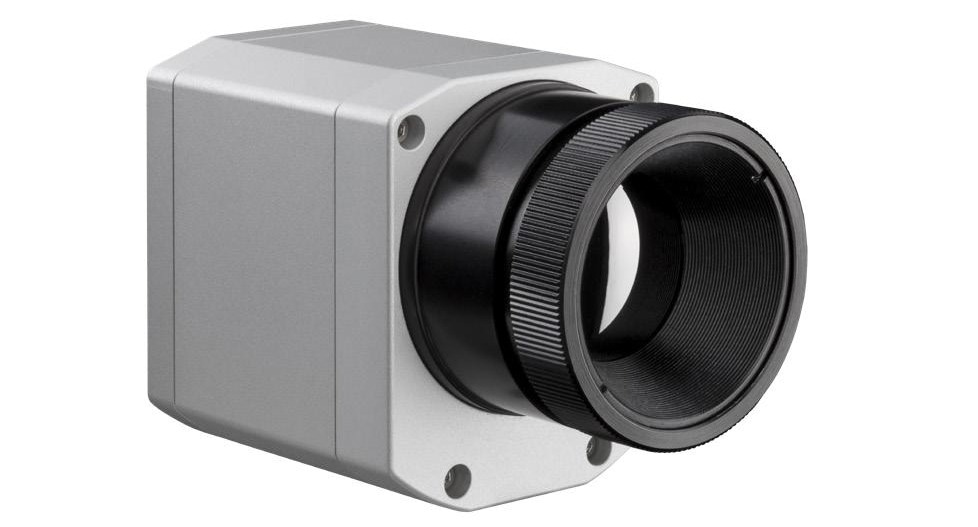
Optris PI 640i. Image Credit: Optris GmbH
Advantages
- 640×480 pixels
- Outstanding thermal sensitivity of 40 mK
- Radiometric video recordings at 32 Hz, 125 Hz in subframe mode
- Interchangeable lenses: 15°, 33°, 60° and 90°
- License-free analysis software and complete SDK included
Specifications
- Temperature ranges:
- -20 to 100°C
- 0 to 250 °C
- 150 to 900 °C
- Optional: 200 to 1500°C
- Spectral range: 8 to 14 μm
- Ambient temperature: 0 to 50 °C
- System accuracy: ±2 °C or ±2%, whichever value is greater
Passive Thermography: Process Monitoring Using Optris Thermal Imaging Camera
Until present, the field of additive manufacturing has predominantly depended on optical monitoring processes. For this reason, SKZ has created a novel imaging option for inline quality assurance of 3D printing utilizing thermography. Optris’s thermal imaging cameras are ideal for this.
Along with alternative methods, passive thermography (which employs the process-induced warming of the material) has proven to be successful. Using Optris’s infrared cameras, it is possible to display the filament deposition live while simultaneously monitoring the process parameters (including print bed and nozzle temperatures).
Monitoring the temperature distribution also permits usual defects (like cracks, cavities, and delamination) to be identified.
Due to its compact design and high resolution, the Optris PI 640i infrared camera is suitable for use in inline inspection.
The thermographic data generated can be analyzed frame by frame, even during capture. The aim is to permit the classification of the print object using an artificial neural network so that fluctuations in the printing process can be identified early.
Optris infrared cameras are at the heart of quality control for 3D-printed components at SKZ. The use of passive and active thermography enables reliable and non-destructive quality inspection both during the printing process and once it is completed.
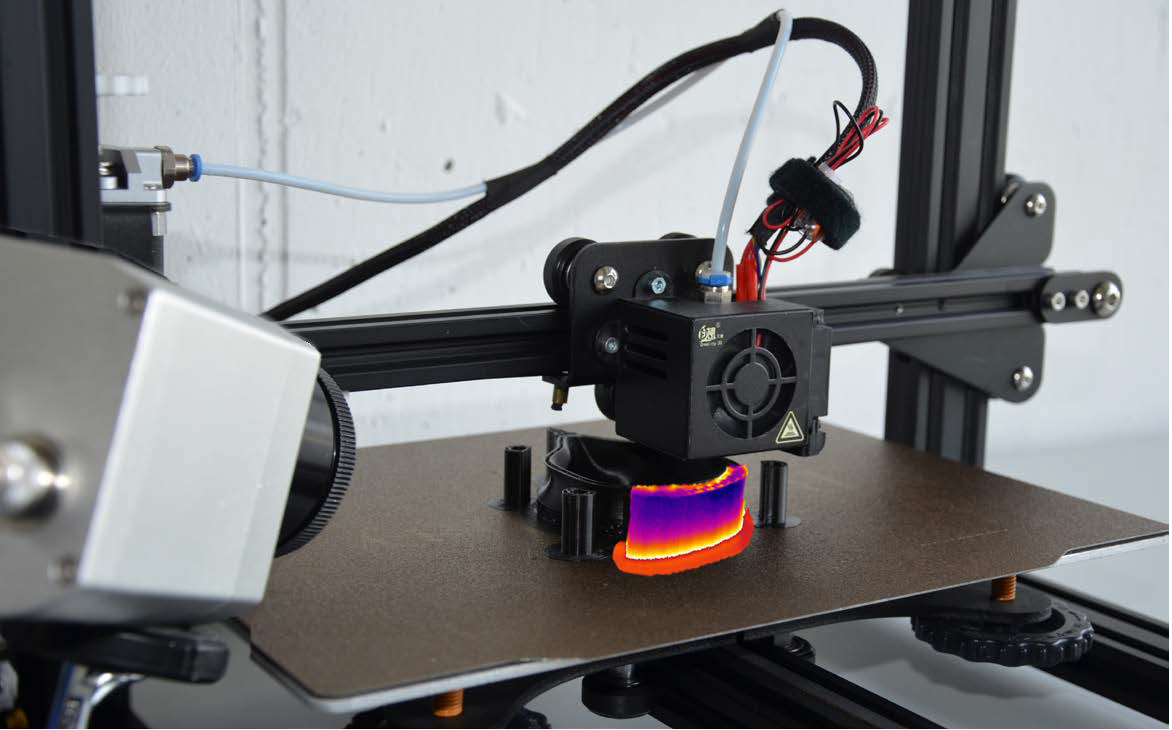
Quality control using the Optris PI 640i during 3D printing with the fused filament fabrication method (composite image with IR view and real image). Image Credit: The German Plastics Center – SKZ
Active Thermography: First the Printing, Then Inspection Using Optris Infrared Cameras
For safety-relevant components especially, it is also prudent to conduct quality control post-print in addition to inline inspection. As the items created are often individual, only non-destructive testing (such as active thermography) can be used.
Optris’s infrared cameras can meticulously inspect complicated components in short order. Defects close to the surface and in the interior of the component can be visualized with the applicable evaluation technology.
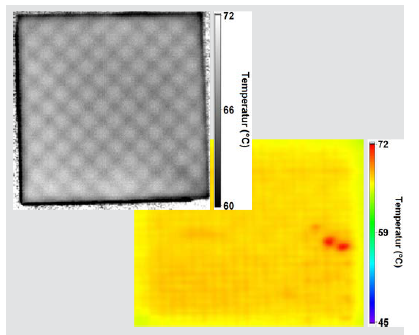
Thermal images from inspection using active thermography: Check the infill through the top layers (top) and detection of delamination (red) in 3D-printed component (bottom). Image Credit: Optris GmbH
Active thermography can be utilized to inspect the profile of the internal support structure, the infill of the object, and the position of any cavities, along with alternative aspects. Optris’s infrared cameras can also inspect components for functionality or damage after the printed objects are in practical use.
Eventually, aging can lead to defects – including the development of cracks or unwanted gaps. Additional damage, such as delamination, can also be identified using Optris’s infrared cameras before component failure.
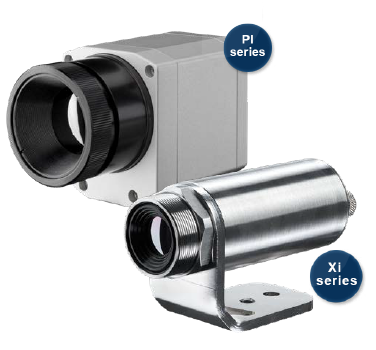
Perfect for use in industry and research: Optris thermal imaging cameras. Image Credit: Optris GmbH


This information has been sourced, reviewed and adapted from materials provided by Optris GmbH.
For more information on this source, please visit Optris GmbH.