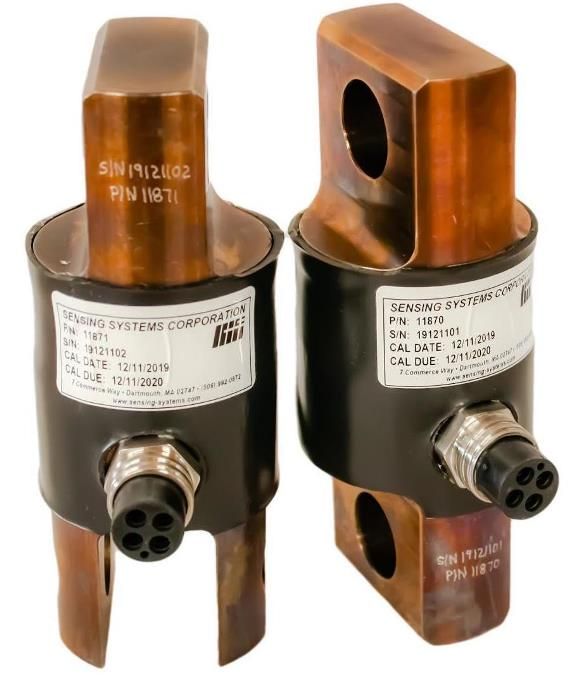
In this interview, AZoSensors talks to Jonathan Armstrong, a manufacturing engineer at Sensing Systems Corporation, about the necessity of Torque sensor and Load cell calibration.
Could you provide an overview of Sensing Systems and the work you carry out within the calibration field?
Sensing Systems provides a broad range of measurement products and services. Specifically, we offer load cells, torque sensors, field services, and calibration services and equipment. We work across all industries, specializing in installing and operating high-quality strain gage based sensors under challenging conditions. This includes engineering, testing, calibration, force measurement, and torque measurement services in-house and at customers’ facilities.
In the calibration field, we are accredited to ISO/IEC 17025:2017 to perform force and torque calibrations on a wide variety of sensors and transducers. We offer standard calibrations to industry specifications, or fully customized calibrations to meet our customer’s needs. For customers who want to perform their own calibrations, we offer standard and custom calibration kits and reference standards to meet your application.
What causes load cells and torque sensors to lose accuracy over time?
Like all measurement instruments, load cells and torque sensors are subject to aging. Mechanical stress and fatigue experienced through normal use will cause sensors to "drift" over time. Although this instability cannot be prevented, it can be identified and corrected by a well-designed calibration program.

An Example of an Underwater Load Cell from Sensing Systems Corporation
What does the calibration process look like for these types of sensors?
Load cells and torque sensors are calibrated by applying a series of known loads from zero to full scale (F.S.) capacity and recording the output of the sensor. Care is taken to choose an adequate number of verification loads, throughout the entire measuring range of the sensor. Typically 5-15 measurements are taken per verification run, and often determined by an industry-standard, such as ASTM E74.
Loads are usually applied in ascending increments, but depending on how the sensor is used in service, it could be calibrated in descending increments, or both ascending and descending. Multiple verification runs are completed to determine the repeatability of the sensor.
Calibrations determine the overall performance of the sensor, which often includes combined error or static error band, non-linearity, non-return to zero, non-repeatability, and hysteresis error.
How often does this calibration need to take place?
A common industry recommendation is to calibrate load cells and torque sensors on an annual basis. This provides a reasonable and reliable assurance program that is adequate for most applications. However, there are a lot of factors that go into determining an appropriate calibration cycle. For certain applications, it may be appropriate to calibrate more or less frequently than 1 year.
To determine an appropriate calibration interval, it is important to consider three main things:
- The acceptable accuracy & uncertainty for your application.
- The frequency of use, and typical 'wear & tear' of the instrument.
- The stability of the sensor, determined through previous calibrations, or manufacturer specifications.
In order to have confidence in your measurements, it is recommended to implement spot checks on your instruments between calibration cycles. This could include comparisons to other calibrated instruments, retesting of retained items to study trends, the use of check standards with control charts, and shunt calibrations or bridge resistance checks.
As with any measuring instrument, any suspected damage to the load cell or torque sensor is cause for immediate calibration prior to being put back into service.

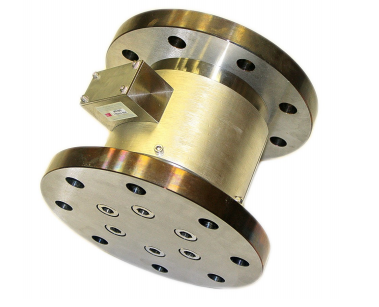
A reaction-type Torque Sensor from Sensing Systems Corporation
How important is the ISO 17025 accreditation when performing torque sensor and load cell calibration services?
ISO 17025 is an international standard that establishes requirements for laboratories to enable them to demonstrate they operate competently, and are able to generate valid results. A laboratory must be accredited by an independent accreditation body, recognized by the International Laboratory Accreditation Cooperation (ILAC). Accreditation assessments are performed by the accreditation body to verify the lab's compliance with ISO 17025 requirements.
There are multiple benefits to working through a 17025 accredited calibration lab. You get independent verification by third-party agencies to ensure compliance, as well as verification of traceability to a National Metrology Institute (NMI), such as NIST. There is also measurement uncertainty for each step in the traceability chain, calculated according to defined methods, such that uncertainty for the whole chain may be calculated or estimated. Using an accredited calibration lab ultimately ensures the technical competence of the calibration staff and the validity and appropriateness of test methods. These labs participate in proficiency testing and interlaboratory comparisons to monitor performance, as well as measurement assurance programs and maintenance of test equipment to ensure the validity of results.
What are the benefits of utilizing a professional calibration process for load cells and torque sensors compared to calibrating these instruments in-house?
A professional calibration provider must invest heavily in equipment, software, and training to provide highly accurate and efficient calibrations. The investment required to perform calibrations in-house is likely significantly higher than the cost to pay a calibration provider to do it for you. Additionally, calibrating equipment yourself may not be as reliable or accurate. While it is possible to calibrate some sensors manually, it is usually worth the investment to have a professional do it. Professional calibration labs with ISO 17025 accreditation are able to provide competent and valid results.
What to consider when determining if you should calibrate yourself:
- Reference Standards: Performing force and torque calibrations require highly accurate reference standards (precision load cells, test weights, indicators, etc.). These reference standards must also be calibrated at an appropriate interval.
- Loading Equipment: Calibration of load cells and torque sensors requires the use of expensive loading fixtures, jacks, torque lever arms, etc.
- Data Calculation & Analysis Software: Most calibration providers use custom software and macros to quickly analyze calibration data to determine errors, accuracy, uncertainties, and acceptance. While it is not impossible, manually analyzing calibration data can be tedious, time-consuming, and prone to errors.
- Measurement Assurance: Most calibration providers have rigorous measurement assurance programs to ensure the validity of results. Having your sensors calibrated by a knowledgeable and reputable source provides validation of your measurement system.
- Independent Third Party Accreditation: The benefits of ISO 17025 accreditation mentioned previously.
- Cost: Ultimately, when weighing the items listed above, the determination of whether to calibrate your sensors in-house comes down to cost. Is the investment in equipment, resources, and time worthwhile?
How is Sensing Systems well-suited to provide these calibration services?
Because our calibration laboratory has met the management and technical requirements of ISO/IEC 17025:2017 accreditation, we have demonstrated our competence to repeatedly produce high-quality calibration and testing results. Additionally, with over 30 years of experience, we have experience performing force and torque calibrations for nearly every industry. Our highly trained calibration technicians and dedicated customer service representatives offer standard calibrations to industry specifications, or fully customized calibrations to meet each customer’s needs.
What is next for Sensing Systems and its calibration technology?
At Sensing Systems, we are constantly iterating on our calibration process. A lot of effort has been made over the last couple of years to improve and validate our calibration and measurement capability through R&R studies, interlaboratory comparisons, and other statistical techniques. We continue to invest heavily in our calibration lab to ensure we are meeting or exceeding the needs and expectations of our customers. This includes expanding our scope of accreditation to include a wider range of forces and torques and adding new disciplines such as pressure and displacement. We're also continuing to upgrade our equipment and reference standards to be able to calibrate a wider range of instruments, at higher capacities, while also reducing our measurement uncertainty. Finally, we're adding automation where possible to improve throughput and reduce turnaround time and cost.
Where can readers find more information?
- Readers interested in force and torque sensor calibration services can visit our website.
- For companies who are able to in-source their calibration needs, we offer standard and custom calibration kits.
- You can also contact us directly. We're happy to answer your questions and recommend a calibration process that meets your needs for reliability and accuracy.
About Jonathan Armstrong
Jonathan Armstrong is a manufacturing engineer who manages all the calibration lab activity at Sensing Systems. His responsibilities include maintaining their ISO 17025 accreditation, as well as the day to day scheduling, determining calibration requirements, and reviewing results.

Disclaimer: The views expressed here are those of the interviewee and do not necessarily represent the views of AZoM.com Limited (T/A) AZoNetwork, the owner and operator of this website. This disclaimer forms part of the Terms and Conditions of use of this website.